
Milky Way Photography in Peru: Seasons, Locations & Gear
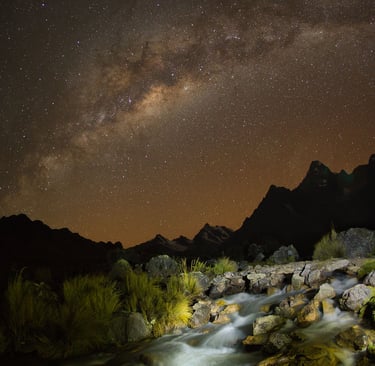
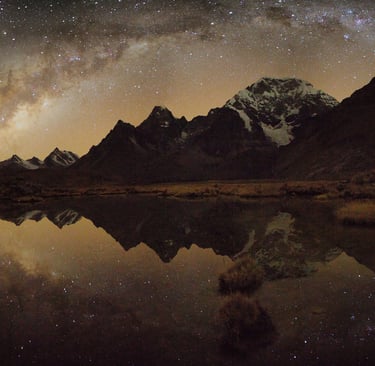
The mountains fade into silhouette. A lake becomes still, the first stars appear, and the landscape begins to look entirely different from the scene you photographed at sunset.
Photo tours peru
11/17/20268 min read
Milky Way Photography in Peru: When to Go, Where to Shoot and What to Bring
The mountains fade into silhouette. A lake becomes still, the first stars appear, and the landscape begins to look entirely different from the scene you photographed at sunset.
Milky Way photography in Peru brings together dramatic foregrounds and the night sky. But a successful session depends on several things aligning: the bright galactic center must be visible, the Moon must suit your composition, the weather must cooperate, and access must be arranged.
This guide explains when to plan your trip, which Peruvian locations to consider, what equipment to bring, and how to prepare for night photography with Photo Tours Peru.
When is the best time for Milky Way photography in Peru?
For a first Andean astrophotography journey, May through September is a strong starting window because it overlaps much of the region’s relatively dry season with useful nighttime visibility of the bright Milky Way core. April and October can also offer opportunities.
The core’s broader Southern Hemisphere viewing season is commonly described as roughly February to October. Exact useful hours depend on your date, latitude, local horizon, and the darkness of the sky.
These are two different calendars:
Astronomy: Is the galactic center above your local horizon during darkness?
Weather: Is the sky likely to be clear enough to photograph it?
A date can be astronomically suitable but cloudy. A beautifully clear night can also have bright moonlight or the core hidden behind a mountain.
Milky Way planning by time of year
Period General planning pattern What to checkFebruary–AprilEarly-season core opportunities often involve late-night or pre-dawn sessions Wet-season conditions, exact rise time, and local horizon May–AugustCore visibility can extend across a broader part of the night Moon-free hours, desired alignment, cold, and cloud September–OctoberEvening core sessions become increasingly relevant Sunset, end of twilight, mountain obstructions, and setting time November–JanuaryThe bright core is generally not a practical dark-night target Consider other star fields, star trails, or different night-sky subjects
This table is a broad guide, not a departure calendar. Check the exact location and date with an astronomy planner before booking around a particular image.
The Milky Way and its bright core are not the same thing
We live inside the Milky Way galaxy. The bright central region seen in many nightscape photographs is only one part of the band.
When photographers talk about “Milky Way season,” they usually mean the months when that central region can be photographed in a sufficiently dark sky.
Outside the main core season, other star fields and night-sky subjects can still be photographed. Be clear about the image you want before choosing dates.
Plan around moonrise and moonset, not just the new moon
Dates near new moon are a useful starting point for dark-sky photography. However, a phase icon alone does not tell you whether the Moon will affect your session.
Check:
The end of astronomical twilight.
When the galactic center clears the local terrain.
Moonrise and moonset.
The Moon’s position relative to your composition.
The hours when these conditions overlap.
A partial Moon may set before your intended session, leaving useful dark hours. On another date, the Moon may remain above the horizon while the core is best positioned.
Moonlight can illuminate mountains, but it also reduces contrast in faint sky detail. Choose it deliberately rather than treating all moonlight as either helpful or harmful.
Where to photograph the Milky Way in Peru
The most useful location combines an interesting foreground, a suitable horizon, manageable access, and an overnight plan that works for your abilities.
Location or region Photographic interest Main planning consideration Ausangate and the Cordillera Vilcanota Mountain silhouettes, highland lakes, and open landscapes High elevation, camping logistics, and local access Rainbow Mountain region High-Andean terrain and varied foregrounds Exact shooting location and permission for nighttime access Cordillera Huayhuash Mountain camps, lakes, and layered peaks Multi-day trekking and weather flexibility Chonta and selected Cusco-region landscapes Canyon or mountain foregrounds Suitable alignment, local lighting, and arranged access Selected rural Andean sites Potential alternatives to a long trek Site-specific scouting, horizon, and landowner permission
Darkness varies between sites. Remote surroundings do not automatically establish a particular Bortle class or a complete absence of artificial light.
Ausangate: mountain landscapes beneath the stars
The Ausangate region offers a high-altitude setting where night photography can be combined with daylight landscape sessions. Photo Tours Peru’s published astrophotography expedition focuses on these landscapes and night-sky opportunities.
Scout foregrounds before darkness. A lake or mountain may look impressive by day but not align with the core during your visit.
Ask how far the night photography location is from camp, what terrain is involved, and how the group returns. The best composition is one that works within a well-organized expedition.
Explore our Ausangate Astrophotography Trek.
Rainbow Mountain: confirm the actual nighttime location
The Rainbow Mountain region can form part of a high-Andean landscape and astrophotography itinerary.
However, booking a daytime visit does not automatically provide access after dark. Ask whether your session takes place at a camp, on community land, or at a specifically authorized viewpoint.
Also consider color. A mountain’s daytime appearance may be much less visible under a dark sky. A silhouette can work well, while a detailed foreground may require another exposure or a different approach.
Explore our Rainbow Mountain Astrophotography Trek — 3 Days.
Huayhuash: a longer landscape and night-sky journey
The Cordillera Huayhuash is suited to photographers who want a multi-day mountain experience with nightscape opportunities.
The challenge is balancing trekking days, recovery, weather, and photography. A full night outdoors may not be sensible before every demanding walking day.
A longer itinerary provides more potential sessions, but not guaranteed clear nights. Ask how the route balances camp locations, rest, and photography.
Explore our Huayhuash Landscape and Astrophotography Trek — 8 Days.
Chonta and other Cusco-region possibilities
A shorter photography journey may combine night skies with canyon landscapes or other Andean foregrounds.
Photo Tours Peru publishes a three-day program combining Chonta, condor photography, stargazing, and Humantay Lake. Confirm the actual night locations and arrangements rather than assuming unrestricted access at every attraction.
Explore our Andean Condors, Humantay Lake and Stargazing Photography Tour.
What makes a good Milky Way photography location?
A foreground with a purpose
Choose a mountain, lake, rock formation, or other feature that adds structure rather than simply occupying the bottom of the frame.
A horizon that works on your dates
A dark location can still be unsuitable if the core is hidden behind a ridge. Plan for the visible terrain, not only an unobstructed-sky chart.
Limited artificial light
Check towns, roads, camps, and nearby buildings. A single light may affect the composition even in a generally remote setting.
Practical access and an overnight plan
Confirm permissions, transport, walking requirements, camp arrangements, and the return route. Scout in daylight and remain within agreed areas.
What to bring for Milky Way photography in Peru
Essential camera equipment
A camera with manual exposure control and RAW capture.
A wide-angle lens; a maximum aperture around f/2.8 or wider is useful.
A sturdy tripod appropriate for your camera and conditions.
A remote release or a reliable self-timer.
Spare batteries and memory cards.
A lens cloth and weather protection.
A lens in approximately the 14–24 mm full-frame-equivalent range is a practical starting choice for wide nightscapes. Other focal lengths can work, but require different exposure and composition decisions.
Clothing and field supplies
Bring warm layers, gloves that allow camera operation, suitable footwear, water, and food as arranged.
Carry a headlamp and a backup light. Use only the light needed for the task, and coordinate with other photographers so lamps do not enter exposures.
Check whether sleeping equipment, meals, charging, transport, and guiding are included. A night photography tour should make those practical details clear.
Optional equipment
A lens heater may help with condensation where suitable. Power banks need to match your actual equipment.
A star tracker is optional. It can extend sky exposures, but the stationary landscape needs a separate treatment. It also adds setup time and carrying weight.
Camera settings for Milky Way photography
Start with a test exposure, then adjust for your camera, focal length, sky brightness, and desired result.
Setting Practical starting point Exposure mode Manual File format RAWA perture Around f/1.8–f/2.8 where availableShutter speed Approximately 8–15 seconds with a wide lens ISO Approximately 1600–6400, adjusted after testing Focus Manual, checked on a magnified star White balance A fixed value for consistency, adjustable in RAW Release Self-timer or remote
These are starting suggestions, not universal settings. A slower lens, longer focal length, high-resolution sensor, or large final print may require a different approach.
How long can you expose without star trails?
There is no single exposure time that works for every setup.
Rules based only on focal length are rough estimates. Sensor characteristics, position in the sky, and how closely you inspect the image matter too.
Use an appropriate exposure calculator or take test frames and inspect stars near the center and edges. Shorten the exposure when trailing becomes distracting.
How to focus at night
Use live view or the electronic viewfinder to magnify a bright star. Adjust focus until the star is as small and defined as possible.
Do not rely on the infinity mark alone. Recheck after moving the lens, changing focal length, or noticing a loss of sharpness.
How to choose ISO
ISO does not add more light to the exposure. It changes how the camera handles the captured signal, with consequences that vary by camera.
Choose aperture and exposure time for the image you need, then test ISO while protecting bright highlights. Review actual files rather than judging exposure only from a bright screen.
Photographing mountains and stars together
A night sky and a dark foreground often require different choices.
Single exposure
A single frame is straightforward and can work well with silhouettes or some moonlit foregrounds.
Separate sky and foreground exposures
You may choose different exposures for sky and land and blend them later. Capture the intended composition carefully and describe the method honestly when sharing the result.
Stacking
A sequence of sky frames can improve the final image when aligned and processed appropriately. Moving clouds, stars, and a stationary landscape require suitable handling.
Panoramas
Overlapping frames can create a wider view, but they require time and care. Practice the sequence before attempting it on a cold mountain night.
Choose the method you understand well enough to use efficiently in the field.
Common mistakes to avoid
Booking only around a new moon without checking core position.
Assuming a famous daytime viewpoint permits nighttime access.
Ignoring mountains that block the planned alignment.
Using a fixed long exposure without checking for star trails.
Forgetting to confirm focus after changing the setup.
Carrying more equipment than you can manage.
Expecting a photograph to look exactly like the naked-eye view.
Scheduling too little rest between trekking and night sessions.
A carefully planned, simple image is often more successful than a complicated setup that becomes difficult to operate outdoors.
Responsible night photography in Peru
Respect local communities, private land, camps, and protected places. Arrange access and keep to agreed routes.
Do not move rocks, damage vegetation, enter restricted areas, or climb archaeological structures to improve a composition.
Keep noise and lighting considerate, especially near homes, livestock, wildlife, and sleeping campers. Ask permission before including people or homes in photographs.
Leave the location as you found it.
Frequently asked questions
Can beginners photograph the Milky Way in Peru?
Yes. Learn manual exposure, tripod use, and night focusing before the trip. Start with one composition and a straightforward single exposure.
Can I photograph it all year?
Other parts of the night sky remain available throughout the year, but the bright galactic core has a seasonal dark-night viewing window. Plan dates for the subject you actually want.
Is new moon essential?
No. It is a useful starting point, but the Moon may be below the horizon during suitable hours on other dates.
Do I need a full-frame camera?
No. Other cameras can produce worthwhile results. Lens choice, focus, exposure, stability, and processing all matter.
Is a telescope necessary?
No. Wide-field Milky Way nightscapes are commonly made with a camera and wide-angle lens.
Are clear skies guaranteed in the dry season?
No. Seasonal patterns improve planning but do not determine conditions on a particular night.
Can I photograph the Milky Way at Machu Picchu?
Do not assume standard visitor tickets provide night access. Any special access would require explicit authorization. Choose locations with confirmed arrangements.
Plan your Peru astrophotography journey with Photo Tours Peru
Tell us your dates, camera equipment, group size, walking preferences, and the foregrounds you hope to photograph.
We can help you compare an Ausangate expedition, a Rainbow Mountain-region itinerary, a Huayhuash trek, or a shorter photography journey near Cusco.
The final plan should align the sky with the landscape, moonlight, access, and the practical needs of the group.
Contact Photo Tours Peru to discuss your Milky Way photography trip.


Contact
Email: phototourperu@gmail.com
Phone: +51 940188346
© 2025. All rights reserved.
Designed by Zihna